
Preparing your development environment
Initial set up for the development of Cloud Functions.
The Makefile that drives a Cloud Function workspace relies on UNIX technologies, making it more difficult for non-UNIX users to set up their workspace.
To solve this issue, the IXON Cloud Functions SDK is set up to run in a Docker container, facilitating its use on any system.
Before using the IXON Cloud Function SDK, you will have to follow a few steps which you can find below.
Install WSL2 (Microsoft Windows users only)
Installing WSL2 is necessary in case the developer is using Microsoft Windows.
-
Open PowerShell as administrator: Right-click the Start menu and select Terminal (Admin), or search for Windows PowerShell, right-click, and Run as administrator.
-
Install WSL2 and its default distro (Ubuntu): Run
wsl --install. Verify withwsl --version. -
Reboot your PC to complete setup.
-
Verify the installation by running
wsl -l -vin PowerShell. This shows installed distributions and their WSL version (you want version 2).
Install Docker Desktop (Microsoft Windows and MacOS)
To work with Cloud Functions on a Microsoft Windows machine, you will first need to Install Docker Desktop. Doing so will automatically also install the Docker Engine on your system.
To install Docker Desktop on your system, follow the Microsoft Windows and MacOS installation guides respectively.
Docker Engine for Linux usersTo run a Docker Engine in your Linux distro, follow the Install Docker Engine article.
How to allow Docker commands to be used in the WSL CLI
This step is needed to allow Docker commands to run in WSL.
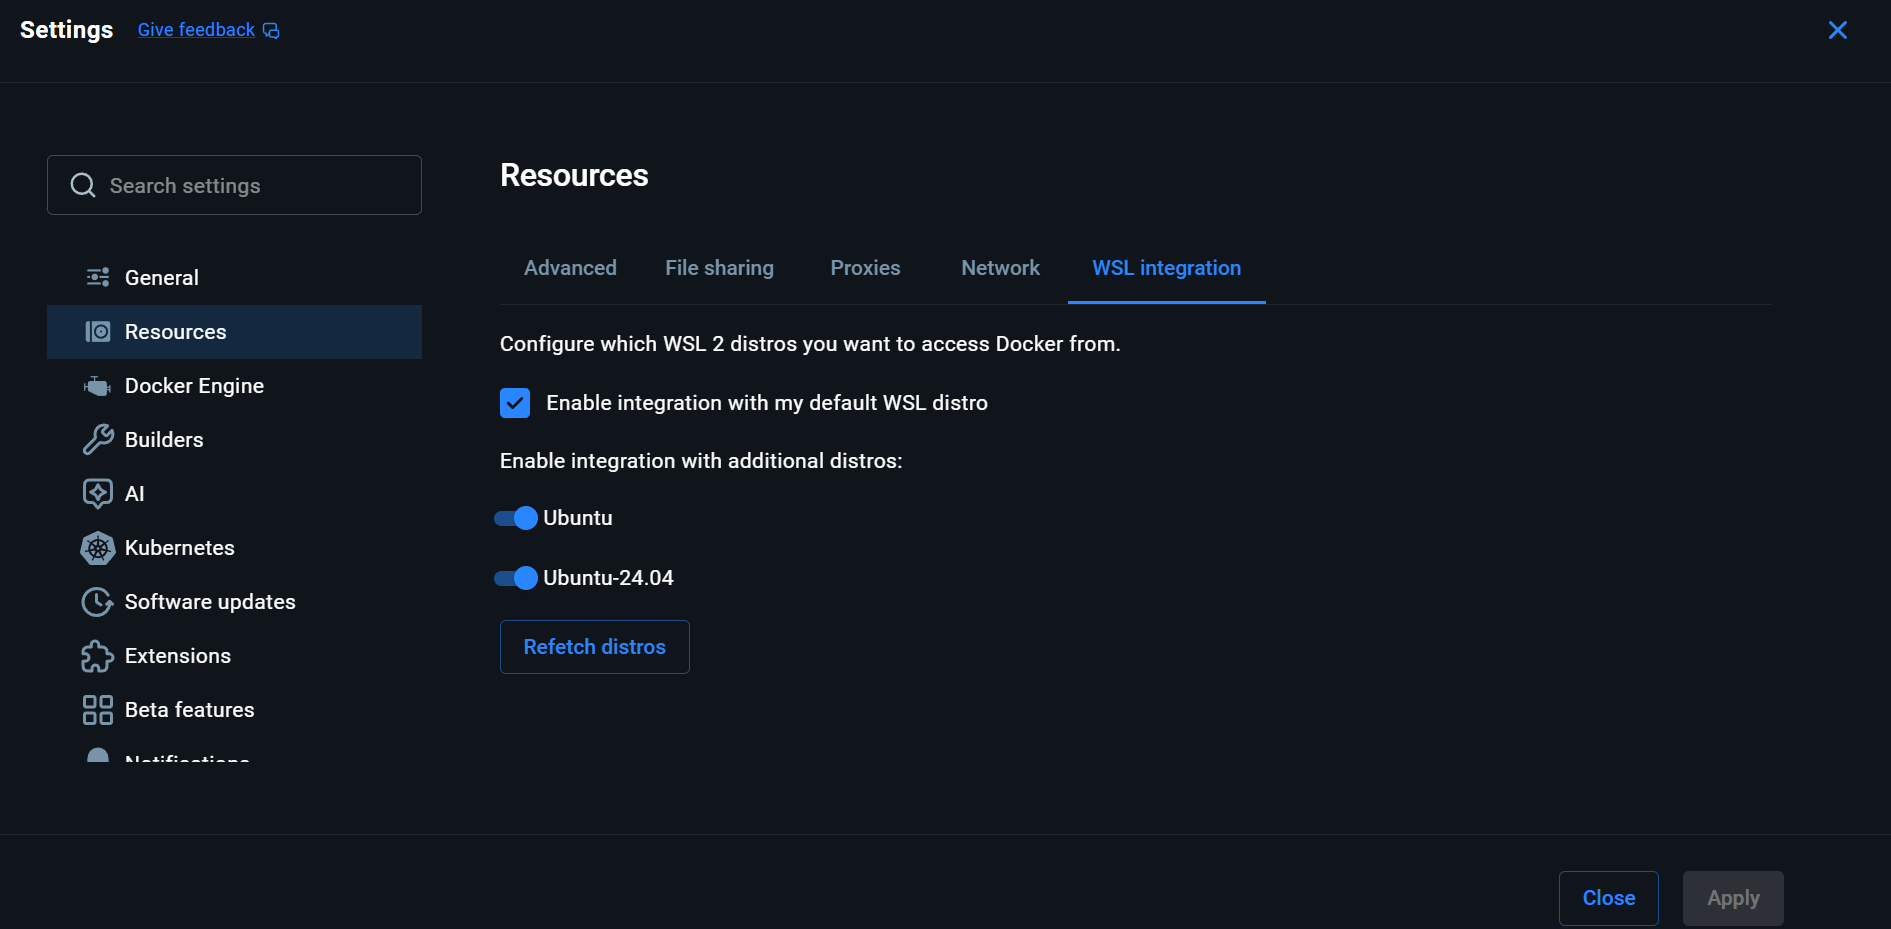
- Open Docker Desktop and navigate to Settings > Resources > WSL Integrations.
- Make sure to check the Enable integration with my default WSL distro option.
- Just to be sure, you can also enable the intergration with additional distros.
Your setup will look roughly like this (Ubuntu 24.04 will not be there unless you have installed it):
Install your preferred editor and "Dev Containers"
Editor choiceThis guide uses VS Code, but any editor with a Dev Container extension works the same way.
The IXON Cloud Functions SDK can be run in a Dev Container to avoid dependencies problems on different systems. To prepare the tools to use this method, follow these steps:
-
Install a preferred editor on your system.
-
Install the Dev Container extension or any equivalent from the editor's marketplace. The example below is taken from the VS Code Extensions marketplace:

-
You can now proceed with the steps listed in the Dev Containers section found in the IXON Cloud Functions SDK.
You now have a working environment and can get started with Cloud Functions!
Updated 3 months ago