IXON API prerequisites
Required modulesRequired module: API Integrations. Check your modules at Admin > Licenses. To obtain this module, contact your IXON account manager or IXON distributor.
Default API URLBy default, IXON Cloud uses the API URL:
USER.URL/api/.
API URL for Beijer customersFor Beijer customers, the API URL is:
https://cloudvpn.acirroplus.com/api/.
OpenAPI endpoint linkIn case you might need to all required metadata, schema definitions, and endpoint details, you can find the OpenAPI specification URL here.
Why use the IXON API?
The IXON API is an open, public API that can help you achieve goals and find solutions tailored to your needs. To get you started, in this article we have explained some important basic steps and functionalities, and we also provide guidence on how to retrieve basic resources, such as an agent, a company, a bearer token but also data sources and tags.
If you want to read more about how these resources are all related to each other, you can take a look at the Guide to Data Mapping in IXON Cloud article.
A few cases in which you would want to use the API are:
-
Historical data insights: Retrieving Historical data for your own analytics, reporting tools or custom dashboards.
-
Seamless integration with other systems: The need to integrate IXON's functionalities with ERPs, CRMs, custom web applications or other SaaS providers.
-
Automatization of processes: Building custom solutions to automatize various processes related to the router itself, to the management of users or even to data points. Many things that are usually done from the Portal's interfaces can be reproduced via the API (e.g. creation of a new user).
-
Retrieve information about your devices: Getting information about devices, users, data sources, tags and much more.
What should you use: the API or the App Engine module?While brainstorming and trying to find a solution to your problem, keep in mind that, if needed, it is possible to use UI Components and Cloud Functions (contained in the App Engine module) together with the API.
For example:
- If you are using UI Components only without needing a Cloud Function (e.g. no backend logic, no DB functionalities, no specific security requirements), you can build an API call using the
getApiUrl()function. Check out the Making API Requests article to learn more about it.- If you are using Cloud Functions (developed with Python) or if want to integrate calls to the IXON API in your own separate project without using the Cloud Functions'
FunctionContext, you can build the API call according to the programming language you are using (e.g. Python, UNIX Shell, etc).
API request architecture: Get started with the IXON API
The following subsections contain all the information you need to understand the IXON API's structure and main characteristics: you will learn what the requirements of an API call are as well as basic knowledge that you will need along the way.
Essential prerequisites for a successful API call
The IXON API supports five types of verbs, namely GET, POST, PATCH, PUT and DELETE, and each request consists of at least a URL and one or more headers. Additionally, fields and filters can be added to get a more organised data response. The APIv2 will respond with JSON or CSV output, depending on the endpoint: for instance, the DataExport endpoint will return a CSV output.
These are the headers that you will be using the most:
- Api Version: The default value is
2. - Application ID: To learn how to get it, check How to get an Application ID.
- Bearer Token: To learn how to get it, check How to get a bearer token.
- Company ID: To learn how to get it, check How to get a company's publicId.
How to identify resources and types: the publicId
The API uses an ID for many entities, which is more commonly called publicId and which functions as the identifier for agents, data sources, users, groups, alarms, invitation requests and much more.
By using the IXON API, you will notice that a response will nearly always contain at least one publicId, and you might wonder whose publicId that is. Keep reading to find out how to figure it out.
How to find the right publicId
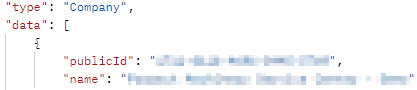
In most JSON responses, there is always a field called type. This fields determines what kind of entity the ID belongs to. For example, the publicId in a response with type "Company" means that this publicId is a "company's id".
IXON Trivia: the "List" endpointsIf you take a look at our API Reference page, you may notice how many endpoints seem to have a "List" counterpart. Let's take, for example, the Agent and AgentList endpoints. What are the differences between them?
- The former (in this case Agent) is mainly used in use cases where recovering just one entity of that type of resource is enough. For example, this endpoint is called whenever a user clicks on a specific agent in Fleet Manager > Devices.
- The latter (in this case AgentList) is instead used whenever an action has to be performed on a list of entities having that resource type. The path to your Devices that we mentioned in the previous point is a clear example of this since it retrieves a list of agents.
How to find the complete list of the IXON API endpoints
Our API Reference contains an up-to-date list of all endpoints and the headers, fields, filters, and body parameters that you can add to the request. The reference guide can also give a preview of responses, and gives you the option to try a request. Samples of some common programming languages are supplied by the reference guide as well.
Tip: How to find an API request/response in your browserA practical source of information is the IXON Cloud itself. Open your browser's DevTools (F12), open the Network tab and execute in the IXON Cloud interface what you want to do via the API. The network log will show you the exact API request, including the endpoint, headers, fields, body, and the response. You can create an overview of all API requests by selecting the type
XHRand filtering onUSER.URL/api. You can also use the Web Inspector to select the item that will take you to the correct API.
Note: Not all endpoints can be used externally!Some endpoints included in the API reference page are not intended for any use outside of IXON's internal logic, and therefore we recommend against implementing them in your own logic, flow or system.
How to visualize your data in a JSON response
Some API responses will not return everything you asked for in a single response and thus require you to send subsequent requests. For example, when requesting a list of your devices, you may only get up to 20 devices in the API response, while you may have more.
How to use the moreAfter and page-after attributes to get a full list of data
moreAfter and page-after attributes to get a full list of dataTo make sure you get everything you're asking for, it is strongly recommended to check every API response for the moreAfter attribute. Note that if the value is null you received the full list in the first response.
Example
You have 30 users in your company, and you will only get 20 in your return of the first call. To see the rest, you will need to grab the value of moreAfter, and then you can send the same request with as a query argument with the next request. You will then receive users 21-30.
This workflow retrieves a full list of Users. We are assuming that the list is made out of more than 20 users:
-
Request the retrieval of a list of Users and copy the value of the
moreAfterfield. Usually, you can find it at the end of the JSON Response. -
Send another request to UserList by adding the value of
moreAfterto thepage-afterquery argument. You may need to repeat this multiple times in case your list is very long.curl --location "https://portal.ixon.cloud/api/users?fields=*&page-after=$moreAfterValue" \ --header 'Api-Version: 2' \ --header "Api-Application: $applicationId" \ --header "Api-Company: $companyPublicId" \ --header "Authorization: Bearer $bearerToken"
Please note: the ? is used for the first query argument. Consequent arguments would need the &, for example USER.URL/api/endpoint?attribute=value1,value2&page-after=moreafter_value.
ExceptionThe DataList endpoint is an exception to this, because
moreAfterwill then always benull. For more information, see Understanding historical data.
How to use the page-size attribute to get a full list of data
page-size attribute to get a full list of dataTo get more data, it is possible to get a larger response by using the page-size attribute, followed by the amount of required returns. This option is limited to a maximum of 4000 returns. See the following example snippet:
curl --location 'USER.URL/api/users?fields=*&page-size=3' \
--header 'Api-Version: 2' \
--header "Api-Application: $applicationId" \
--header "Api-Company: $companyPublicId" \
--header "Authorization: Bearer $bearerToken"
How to use page-size, page-after and the value of moreAfter to get a full list of data
page-size, page-after and the value of moreAfter to get a full list of dataIf you so desire, you can use page-size together with page-after and the value of moreAfter to visualize even more data without having to run more requests. In this case, use another & to separate the two fields, like such: ?attribute=value1,value2&page-size=3&page-after=$moreAfterValue. See the code snippet below for an example:
curl --location "https://portal.ixon.cloud/api/users?fields=*&page-size=3&page-after=$moreAfterValue" \
--header 'Api-Version: 2' \
--header "Api-Application: $applicationId" \
--header "Api-Company: $companyPublicId" \
--header "Authorization: Bearer $bearerToken"
The Discovery endpoint: How to get an up-to-date list of endpoints
The Discovery endpoint serves as a starting point to 'discover' the other endpoints and their URLs. In your code, a request to the discovery should be made before the other endpoints are accessed.
Every endpoint object will be return:
- A
href, which consists of the URL itself. - A
rel, which consists of the 'nickname' of the endpoint, which also works as its identifier.
Recommended workflow
To avoid hard-coding URLs in your projects and therefore running into problems in case the URL is changed, we advise that you retrieve the URLs that you need via the Discovery endpoint. You can see how this is done by checking out a tutorial in the IXON API Code Tutorials macro-section.
To recover an endpoint make sure to use the rel field in your code, and based on that retrieve the href field belonging to it. This will return the most up-to-date URL from the discovery endpoint. An example of how to make a request to the discovery endpoint is given below:
curl --request GET \
     --url 'USER.URL/api/' \
     --header 'Api-Version: 2'
{
"type": "Discovery",
"data": [
{
"rel": "AccessRecoverList",
"href": "https://portal.ixon.cloud/api/access-recover",
"methods": [
"GET",
"POST"
]
},
{
"rel": "AccessTokenList",
"href": "https://portal.ixon.cloud/api/access-tokens",
"methods": [
"GET",
"POST",
"PATCH",
"DELETE"
]
}
],
"moreAfter": $moreAfterValue,
"status": "success"
}How to get a company's publicId
All users and agents in the IXON Cloud are part of a company. To help identify what agents and/or users you are requesting information for, many requests require a company ID. The CompanyList endpoint will return all companies that you have access to, including their publicId. Examples of the request and response, including the required headers, for a company ID are displayed below:
curl --request GET \
     --url 'USER.URL/api/companies?fields=publicId,name' \
     --header 'Api-Version: 2' \
     --header "Api-Application: $applicationId" \
     --header 'Content-Type: application/json' \
     --header "Authorization: Bearer $bearerToken"
{
"type": "Company",
"data": [
{
"publicId": "$companyPublicId",
"name": "$companyName"
}
],
"moreAfter": null,
"status": "success"
}How to get an agent's ID
Additionally, requests can require further specification for a specific agent (IXrouter or IXagent). You can request all agent IDs in a company using the AgentList endpoint. To identify the agent we advise to include the fields publicId, name and deviceId. This way the name of the agent and the MAC address/Serial Number are included as well. Examples of the request and response, including the required headers, for a company ID are displayed below:
curl --request GET \
     --url 'USER.URL/api/agents?fields=publicId,name,deviceId' \
     --header 'Api-Version: 2' \
     --header "Api-Application: $applicationId" \
     --header "Api-Company: $companyPublicId" \
     --header 'Content-Type: application/json' \
     --header "Authorization: Bearer $bearerToken"
{
"type": "Agent",
"data": [
{
"publicId": "$agentPublicId",
"name": "$agentName",
"deviceId": "$macAddress - $serialNumber"
}
],
"moreAfter": null,
"status": "success"
}
Difference between an agent'spublicIdand itsdeviceId
- A
publicIdof an agent is the main identifier used after the router's registration. It's used to connect the agent to the VPN, to retrieve or send data, and more. This is what it looks like:9MuFepQeCJWL.- A
deviceIdcorresponds to the ID of the actual hardware device, and it's used during its registration. It's composed by the MAC address and the Serial Number of the hardware. For example:C0:D3:91:31:A6:49 - 17077319.
Use cases
In these subsections you will find a few examples and use cases using the IXON API.
How to access data sources and tags of an agent
Once you have identified the agentId, you can use it to query for a list of data sources and a list of tags through the AgentDataSourceList and AgentDataTagList endpoints respectively.
What you will need:
- Your
companyId. - Your
applicationId. - Your
bearer token.
The information you will obtain can in turn be used to query historical data and more. For more information see Requesting data with the DataList endpoint, and for a full code implementation check out our How to retrieve historical data using the DataList endpoint tutorial.
Data sources
Refer to this example to retrieve data sources:
curl --request GET \
     --url "USER.URL/api/agents/$agentId/data-sources?fields=publicId,name" \
     --header 'Api-Version: 2' \
     --header "Api-Application: $applicationId" \
     --header "Api-Company: $companyPublicId" \
     --header 'Content-Type: application/json' \
     --header "Authorization: Bearer $bearerToken"
{
"type": "AgentDataSource",
"data": [
{
"publicId": "$dataSource1PublicId",
"name": "$dataSource1Name"
},
{
"publicId": "$dataSource2PublicId",
"name": "$dataSource2Name"
}
],
"moreAfter": null,
"status": "success"
}Tags
Refer to this example to return all data tags from all data sources that are configured on an agent:
curl --request GET \
     --url "USER.URL/api/agents/$agentId/data-tags?fields=publicId,name,tagId,slug" \
     --header 'Api-Version: 2' \
     --header "Api-Application: $applicationId" \
     --header "Api-Company: $companyPublicId" \
     --header 'Content-Type: application/json' \
     --header "Authorization: Bearer $bearerToken"
{
"type": "AgentDataTag",
"data": [
{
"publicId": "$tagPublicId",
"tagId": 2,
"name": "$tagName",
"slug": "$slugName"
},
{
"publicId": "$tagPublicId",
"tagId": 4,
"name": "$tagName",
"slug": "$slugName"
},
{
"publicId": "$tagPublicId",
"tagId": 1,
"name": "$tagName",
"slug": "$slugName"
},
{
"publicId": "$tagPublicId",
"tagId": 1,
"name": "$tagName",
"slug": "$slugName"
},
{
"publicId": "$tagPublicId",
"tagId": 3,
"name": "$tagName",
"slug": "$slugName"
},
{
"publicId": "$tagPublicId",
"tagId": 2,
"name": "$tagName",
"slug": "$slugName"
}
],
"moreAfter": null,
"status": "success"
}
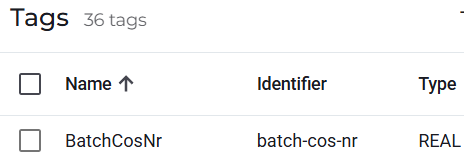
Note about slugs"Slug" is just another way to call a variable's identifier. A quick way to find it is by going to Fleet Manager > Devices > Device of choice > Data sources > Data source of choice > Tags and taking a look at the value in the identifier field:
In general, as shown above, a slug/identifier consists of the Tag name written in lowercase with a dash separating each word (instead of camel-case or a space).
The "tagId is, instead, the identifier used in the time-series database. If you won't be using functionalities related to direct InfluxDB access, you most likely will not need to use it.
Where to find more use cases
If needed, you can consult the following sections/articles to find more how-tos and use cases:
- Use cases for managing groups, users, roles.
- Use cases for managing devices.
- Use cases for managing assets (more information coming soon).
- Use cases for managing custom fields.
- Use cases for managing access requests.
- Use cases for managing MQTT Brokers and their clients.
Updated about 1 month ago