How to visualize a Cloud Function in a UI Component
Build a UI Component that calls your Cloud Function and renders its response.
This guide pairs the Cloud Function you built in How to create a Cloud Function with a custom UI Component, so a user can trigger it with a button and see the response in their browser.
For a full reference on UI Components, see the UI Components documentation.
What you need
In addition to the workspace and function from the previous guide:
- Node.js 18 or newer.
- (Optional) Git — only needed if you use
degitto scaffold the UI Component. - Windows users: make sure you've completed Prerequisites for Microsoft Windows systems.
Part 1 — Set up the UI Component side
The UI Component lives in the same workspace as the Cloud Function, in the components/ folder. We'll install the CDK packages, then generate a new component.
Install the CDK packages
From the workspace root:
npm i -D @ixon-cdk/core@latest @ixon-cdk/runner@latestThis installs the cdk toolchain — templates, simulator, and builders.
Generate the component
Navigate to components/ and generate a new component, picking a template and a variant when prompted (this guide uses Svelte with JavaScript + CSS):
npx cdk generate your-ui-component
Don't rename thefunctionsfolderThe Ingress is exposed on the
./functionsmodule by default. Renaming it breaksmake runwith a "No such file or directory" error. If you add a new file alongsidelogbook.pywith a different name, also create an empty__init__.pyso Python treats the folder as a package.
Logging into the IXON Portal via terminal
To simulate with real data, make sure to login to the IXON Portal. Doing so will ask for your IXON Portal account login credentials, and will automatically create an .accesstoken file containing a bearer token. This is also needed for further deployment and publishing of both UI Components and Cloud Functions.
Use this command to log in:
npx cdk loginPart 2 — Build the UI
Open components/your-ui-component/your-ui-component.svelte and replace its contents with:
<script>
  import { onMount } from 'svelte';

  export let context;
  export let client;

  let notes = [];
  let noteText = '';

  onMount(async () => {
    client = context.createBackendComponentClient();
    await fetchNotes();
  });

  async function fetchNotes() {
    notes = await client.call('functions.logbook.get_notes', {});
  }

  async function addNote() {
    if (!noteText.trim()) return;
    await client.call('functions.logbook.add_note', { text: noteText });
    noteText = '';
    await fetchNotes();
  }
</script>

<main>
  <form>
    <input bind:value={noteText} placeholder="Enter maintenance note..." />
    <button on:click={addNote} type="button">Add note</button>
  </form>
  <ul>
    {#each notes as note}
      <li><strong>{note.author}</strong> — {note.timestamp}<br />{note.text}</li>
    {/each}
  </ul>
</main>
Two things to notice:
context.createBackendComponentClient()builds a client wired to your Cloud Function — no manual auth setup needed.client.call('functions.logbook.get_notes', {})andclient.call('functions.logbook.add_note', { text: noteText })invoke your functions by their dotted path, with named arguments matching the function's parameters. Remember to always include the defaultfunctionsfolder.
Part 3 — Run the simulator
You'll need two terminals for this — one for the Cloud Function, one for the UI Component.
Terminal 1 — start the Cloud Function
In the workspace root:
make runYou should see the Ingress start, the same as in the previous guide.
Terminal 2 — start the UI simulator
npx cdk simulate your-ui-componentWhen the simulator opens, go to Settings > Component and confirm that Local Cloud Function Ingress is selected. Without this, the simulator won't know to call your local Ingress.

Type a maintenance note in the input field and click Add note. The component calls add_note, then immediately calls get_notes and renders the updated list:
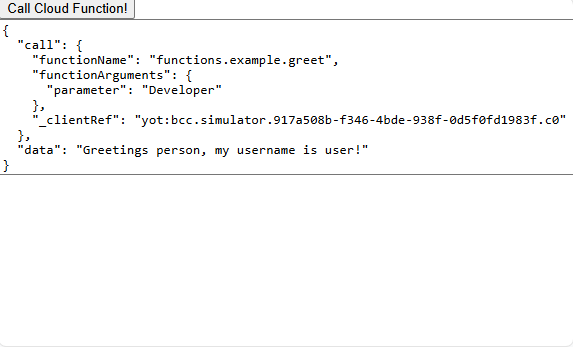
A simple UI component calling a Cloud Function.
In the terminal running make run, you'll see an HTTP log entry for each call:
127.0.0.1 - - [13/Oct/2025 14:03:31] "POST / HTTP/1.1" 200 40
2025-10-13 14:03:32 - ixoncdkingress - INFO - Loading context values from ./context_values.yaml
2025-10-13 14:03:32 - ixoncdkingress - INFO - context values: {'maxNotes': 10}
You've now successfully wired a UI Component to your Cloud Function in the local simulator.