How to manage factors
This article will explain how factors are applied in the IXON Portal or in IXON Components and how to use them efficiently.
In this guide we will outline how scaling factors are applied across the IXON Cloud and we will provide best practices for setting them up. We assume you understand that a factor is a multiplier used to convert raw PLC integer values (e.g., 230) into meaningful, real-world units (e.g., 23.0 °C).
Where factors are applied
A factor can be set in two places, and the location where you set the factor determines its scope:
- On the data source variable itself.
- Within the inputs of a component.
Which one is the default factor?
The primary factor should be set on the data source variable. This factor is considered the default for your machine's data point and is applied universally. You can find it in Fleet Manager > Devices > Device of choice > Variables > Variable of choice > Edit (three dots):
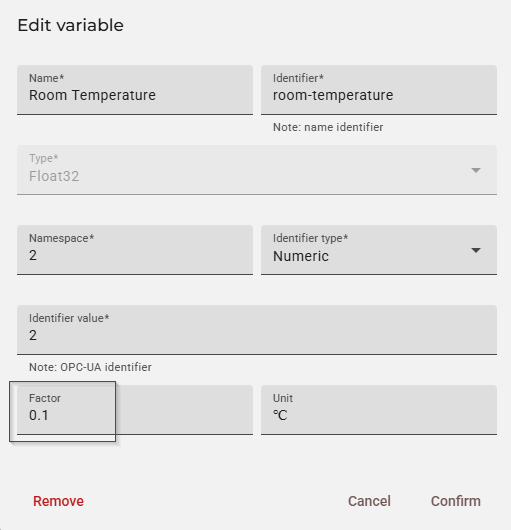
With a 0.1 factor, if we received 230 as raw value from our PLC, we could easily turn it into 23.0°C and make it more readable.
Factor application logic: Historical data vs. Live data
In case of Historical Data, the application of a factor to the variable is performed server-side, via requests that are automatically sent to the DataList (/data) endpoint. This ensures that the scaled value will be applied wherever the historical data is used (e.g. historical analysis (e.g. graphs or tables), reports, etc.).
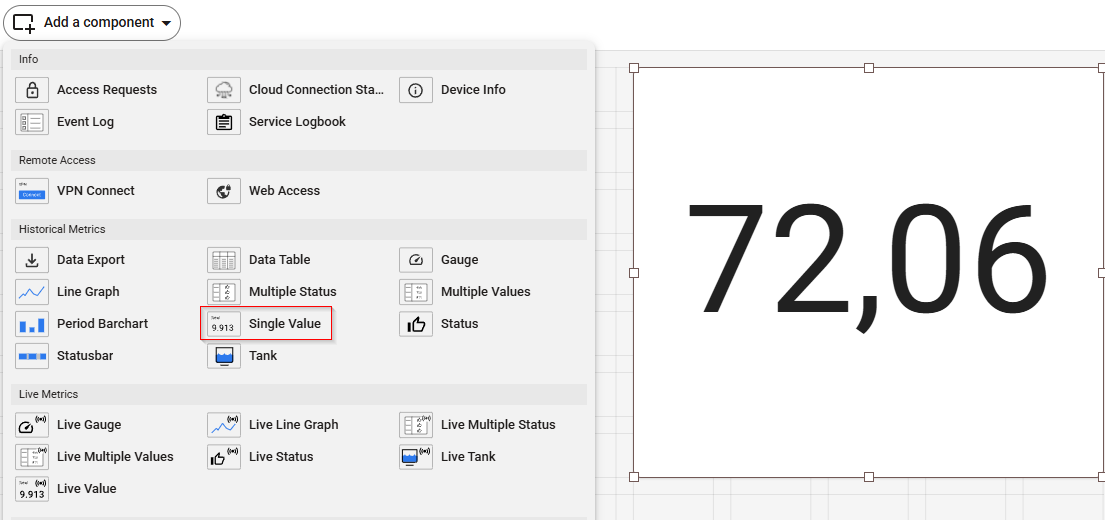
Examples of Historical Data can be visualized via any component in the Historical Metrics section in the Studio. In this case, we are using the Single Value component to retrieve the median value of a variable.
In case of Live Data, the factor is also applied to all real-time data streams. This calculation happens in the web application for components in the Studio or features like "Run test" in Fleet Manager, ensuring that live values displayed to operators are always accurate and human-readable.
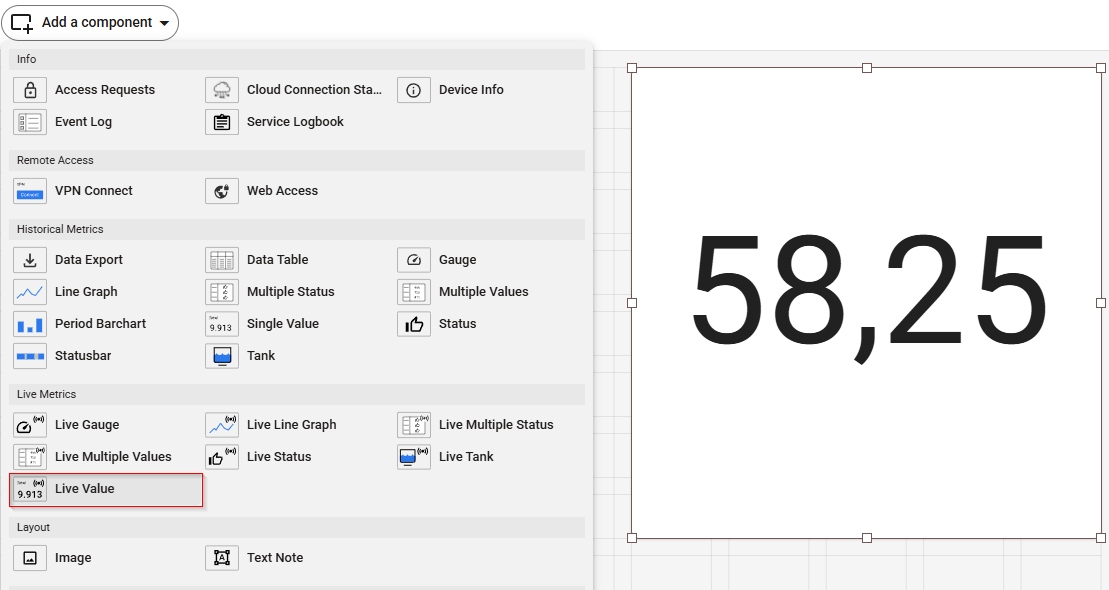
Examples of Live Data can be visualized via any component in the Live Metrics section in the Studio. In this case, we are using the Live Value component to visualize the changing of the value of a variable in real-time.
Overriding Factors: when and how does it occur?
You may have specific analytical needs where a different scaling factor is required for a single graph or table. For this scenario, you can set a factor directly via the inputs of the component in the Studio. This can be done for both Live Data components and Historical Data components.
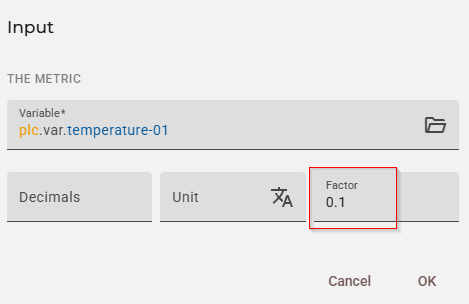
When a factor is set on both the data source variable and a component, the component's factor takes precedence only for that specific graph, table, etc.. It does not affect any other part of the platform.
Here's a practical example: if the variable's factor is 0.1 but you set a factor of 0.01 in a line graph component's settings, only that graph will use 0.01 for its calculations and display. All other components will continue to use the default 0.1.
Development tip: how to double-check the value of a factorTo be 100% certain about which factor is being used, you can use your browser's developer tools to inspect the network requests. In the Studio, after you have properly set up the component, refresh the page, use F12 to find the request made to the AgentDataVariableList endpoint and check the response body to check the value of the
factorfield. Make sure that the variable'snamefield is the correct one. Here is an example of a JSON retrieved from the Studio:{ "type": "AgentDataVariable", "data": [ { "device": { "publicId": "<devicePublicId>", "reference": { "name": "AgentDevice" } }, "source": { "publicId": "<sourcePublicId>", "reference": { "name": "AgentDataSource" } }, "publicId": "<variablePublicId>", "variableId": 19, "name": "Temperature-04", "address": "23", "slug": "temperature-04", "type": "int", "signed": true, "width": "16", "factor": "0.0100000", "unit": null, "maxStringLength": null, "forAlarming": true, "forLogging": true, "internalUse": false, "updateable": true } ], "moreAfter": null, "status": "success" }Note: the factor is also visible in the response of endpoints that contain a
variableobject.
Application of factors in Data Export functionalities
The logic used to override factors that we mentioned in the previous section also applies to data exports. When using the Export to CSV function from a historical data component, there can be two possible scenarios:
- If a specific factor is set in the historical component's settings, the exported data will be scaled using the applied factor.
- If a specific factor is not set in the historical component's settings, the exported data will be scaled using the default factor from the data source variable.
How to manage factors efficiently
The most efficient and recommended way to manage factors consists of following two simple "rules":
- Set the most commonly used factor on the data source variable: this ensures your data is consistently and correctly scaled for live monitoring and general historical analysis.
- Only set a specific factor for exceptions or specific components: if you need to visualize the data with a different unit or scale for a specific, one-off analysis, override it in that component. This approach keeps your data configuration clean and predictable while offering the flexibility you need for in-depth analysis.
Updated about 3 hours ago