Prerequisites for development on Microsoft Windows systems
Microsoft Windows system setupIf you are not using a Microsoft Windows machine, you can skip this tutorial.
To ensure the proper functioning of the development environment needed for the SDK, it is necessary to have your project running in WSL. This is due to the fact that the Makefile of a backend component is based on UNIX technologies: since it is not supposed to be changed (it could cause breaking issues), we provide this alternative solution for developers using Microsoft Windows.
Install WSL2
As a start, all we will need is an open terminal:
-
To open PowerShell as administrator, right-click the Start menu and select “Terminal (Admin)”, or look for "Windows PowerShell" in the search bar, right-click and run as administrator.
-
To install WSL along with the default Ubuntu distribution, and run
wsl --installand check the WSL Installation withwsl --version.
If you want a specific Ubuntu version (e.g., Ubuntu 22.04 or 24.04), first list available distributions with wsl --list --onlineand then install your desired version, in this case with wsl --install -d Ubuntu-24.04. You should see a line saying "Downloading: Ubuntu 24.04 LTS" and a loading bar.
NoteIt is possible to install another preferred Ubuntu version, but we recommend a recent and up-to-date one.
-
After installation, reboot your PC to complete the setup;
-
On the first Ubuntu launch (by searching “Ubuntu” or “WSL” in the Start menu), you’ll be prompted to create a UNIX username and password. This user will have
sudoprivileges and will be able to use sudo commands in the terminal. Make sure to store these somewhere safe. -
Verify the installation: to check your installed distributions and their WSL version, run
wsl -l -v. This will show the state and WSL version (2 for example) of your Ubuntu installation. -
You can start Ubuntu anytime by searching for "Ubuntu" or “WSL” in the Start menu or by running
wsl -d UbuntuORwsl -d Ubuntu-24.04, both work. Your command line should look somewhat like this:username@DESKTOP-ABC123:~$
Optional:It is also possible to start WSL explicitly with
wsl -u root, after which the command line will look along these lines:root@DESKTOP-ABC123:/mnt/c/Users/username#.
Installing Python3 on WSL
You will also need Python and its kit installed on your WSL. Therefore, follow these steps:
- After installing WSL2 Ubuntu (or other WSLs), open it by searching "WSL" in the Windows Search bar, or simply type the
wslcommand in a Powershell terminal to enter it. - Once you're in, you can then run
sudo apt updateandsudo apt upgradein succession to ensure that the packages are up to date. - You will need Python 3.x together with the
pipandvenv. You can use thesudo apt install python3 python3-pip python3-venvcommand to install it, andpython3 --versionandpip --versionto verify the installation.
Depending on the version of theixoncdkingressthat you are using, you will need:- Python 3.10 or higher if you are using
ixoncdkingress v0.x.x. - Python 3.12 or higher if you are using
ixoncdkingress v1.x.x. Best practices include using updated version of the ixoncdkingress, therefore this option is recommended. For more information, check the Updating the Cloud Function workspace article.
- Python 3.10 or higher if you are using
Using WSL via VS Code Remote and accessing Windows folders
Prerequisites: VS Code, WSL and Python3 (in WSL)
NoteThis example features the use of VS Code, but you can use another preferred editor as long as you are working in a WSL through the use of an extension.
To work on Cloud Functions and access Linux folders seamlessly, you will need to work with WSL through VS Code.
To do so, follow these steps:
-
Install Visual Studio Code on Windows.
-
Install WSL from the VS Code Extensions marketplace:
This extension comes with a detailed guide available on the same page in the marketplace. Ensure WSL is enabled and a Linux distribution (like Ubuntu) is installed on your system (if not, follow the Install WSL2s section of this guide).
-
To open a WSL Session in VS Code, press Ctrl+Shift+P or View > Command Palette, type WSL: Open Folder in WSL…, and select it. Once you will select the project folder, this will open a new VS Code window connected to your default WSL distro.
Please note:In WSL, your Windows drives are mounted under /mnt. For example, your C: drive is available at /mnt/c. After selecting WSL: Open Folder in WSL... you will be in
/home/usernameby default, which is not the correct path to reach the C:/ drive in WSL. Erase until the first / and type mnt, browse toc/Users/and the rest of the path, then press OK. You should see something similar to this:
Alternatively, by opening a WSL terminal in a regular VS Code workspace, navigate to your desired directory and run
code ..With any of these options, the project folder will be available in VS Code within the WSL environment and in the venv folder provided by IXON’s Development Environment. This way, all of the necessary dependencies, tools and kits are available seamlessly, without needing to declare any of those requirements in the requirements.txt file.
You now have a working WSL environment through a VS Code workspace!
Optionals
- You can also use the WSL terminal to open a Windows folder in VS Code using this chained line:
cd "/mnt/c/Users/\<your_Windows_username>" && code .
Important to know:This line won’t work if you do not chain it with &&!
Please note:If you are already using a WSL bash terminal in VS Code, the aforementioned line won’t work. Use this line instead:
code "/mnt/c/Users/\<your_Windows_username>"
-
If needed, you can access WSL files from Windows from Windows File Explorer by entering
\\wsl$\\Ubuntu\\home\<your_linux_username>. Note that your linux username will likely have an underscore separating your name and last name instead of a space, and it might not contain any capital letters.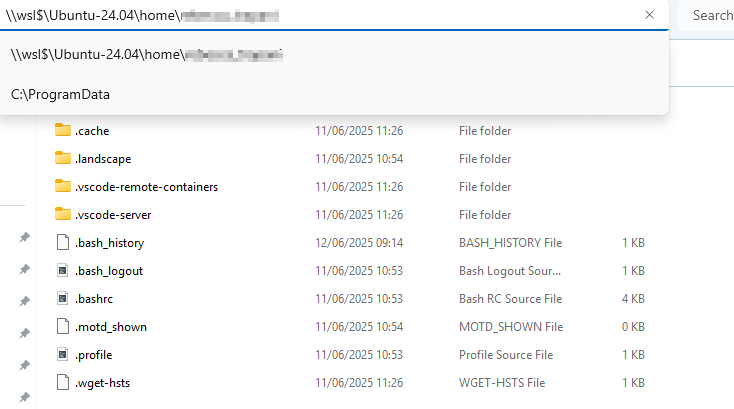
Replace "Ubuntu-24.04" with your actual distro name in case you are using a different version. This lets you view and edit WSL files directly from Windows.
Updated about 1 month ago